

How To Make A Photo Into A Drawing
How to plough photos into drawings using Photoshop
Main this bang-up photograph-to-drawing effect

The photo-to-drawing event is i of our favourite Photoshop effects and it'southward surprisingly easy to achieve. In this tutorial nosotros'll prove you how to turn photos to cartoons using an assortment of filters and unproblematic brushwork.
Filters that turn your photos into drawings or paintings have been around in Photoshop for years. Even so, in that location have always been 2 issues with them: first, they've been used to death, and second, about of them aren't all that disarming.
To get a good effect requires more than only slapping a filter over an image - instead yous'll need to combine filters with paw-painted brushwork and other Photoshop skills.
What you lot'll learn
In this tutorial you'll acquire how to plow a portrait into a cartoon extravaganza with the help of a few Photoshop filters and some painting with the Brush tool.
We'll brainstorm by creating a sketch of our model, which involves an unusual use for the Gaussian Blur filter. From hither we'll use the castor to colour in the skin, pilus and clothes.

Pace one: Convert to sketch
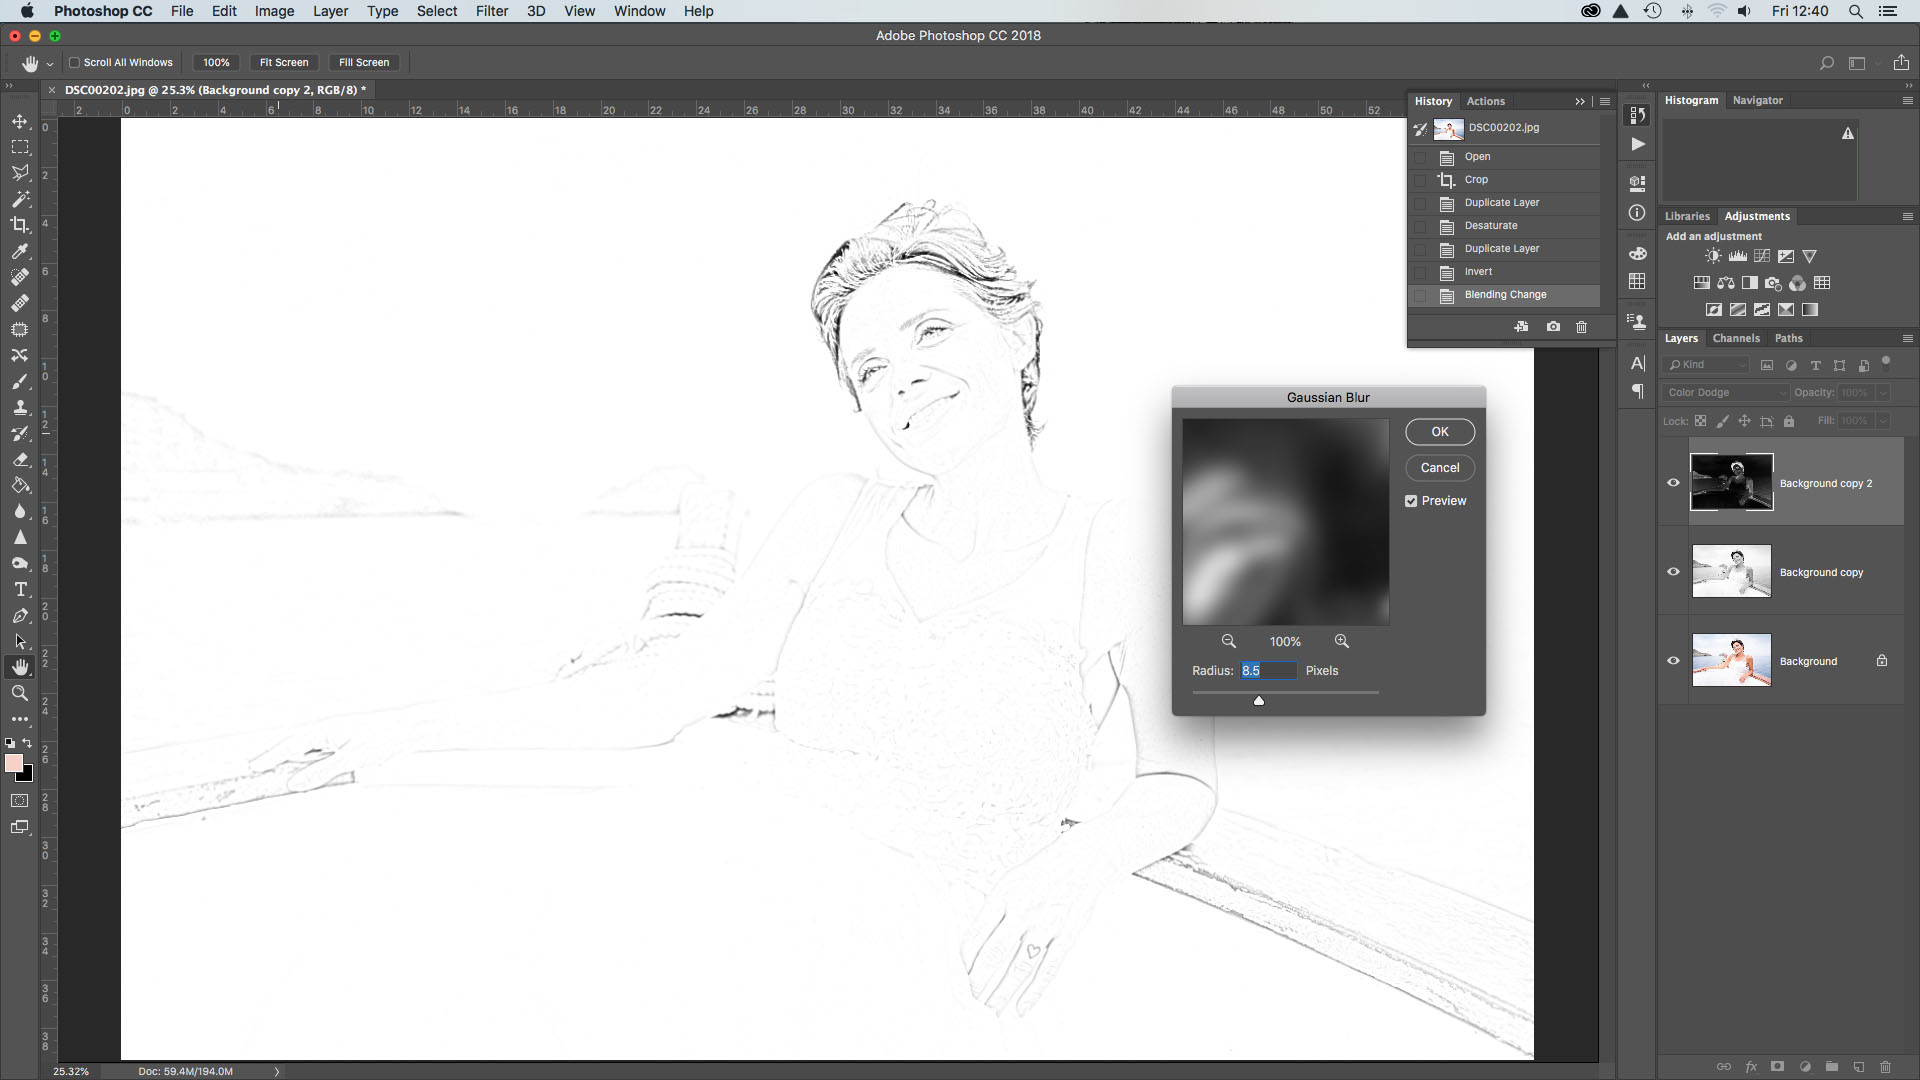
Open up your kickoff paradigm - photos work all-time with quite simple compositions. Hit Cmd/Ctrl + J to duplicate your background layer, and then Cmd/Ctrl + Shift + U to desaturate the new layer.
After you lot've done this, hit Cmd/Ctrl + J again to duplicate the new mono layer, and then Cmd/Ctrl + I to invert the tones. Now we need to alter the Blend Fashion to Color Dodge. Don't worry if the image goes almost completely white. Then go to Filter > Blur > Gaussian Mistiness. Gear up Radius to 8px and hitting OK.
Footstep 2: Make lines stronger
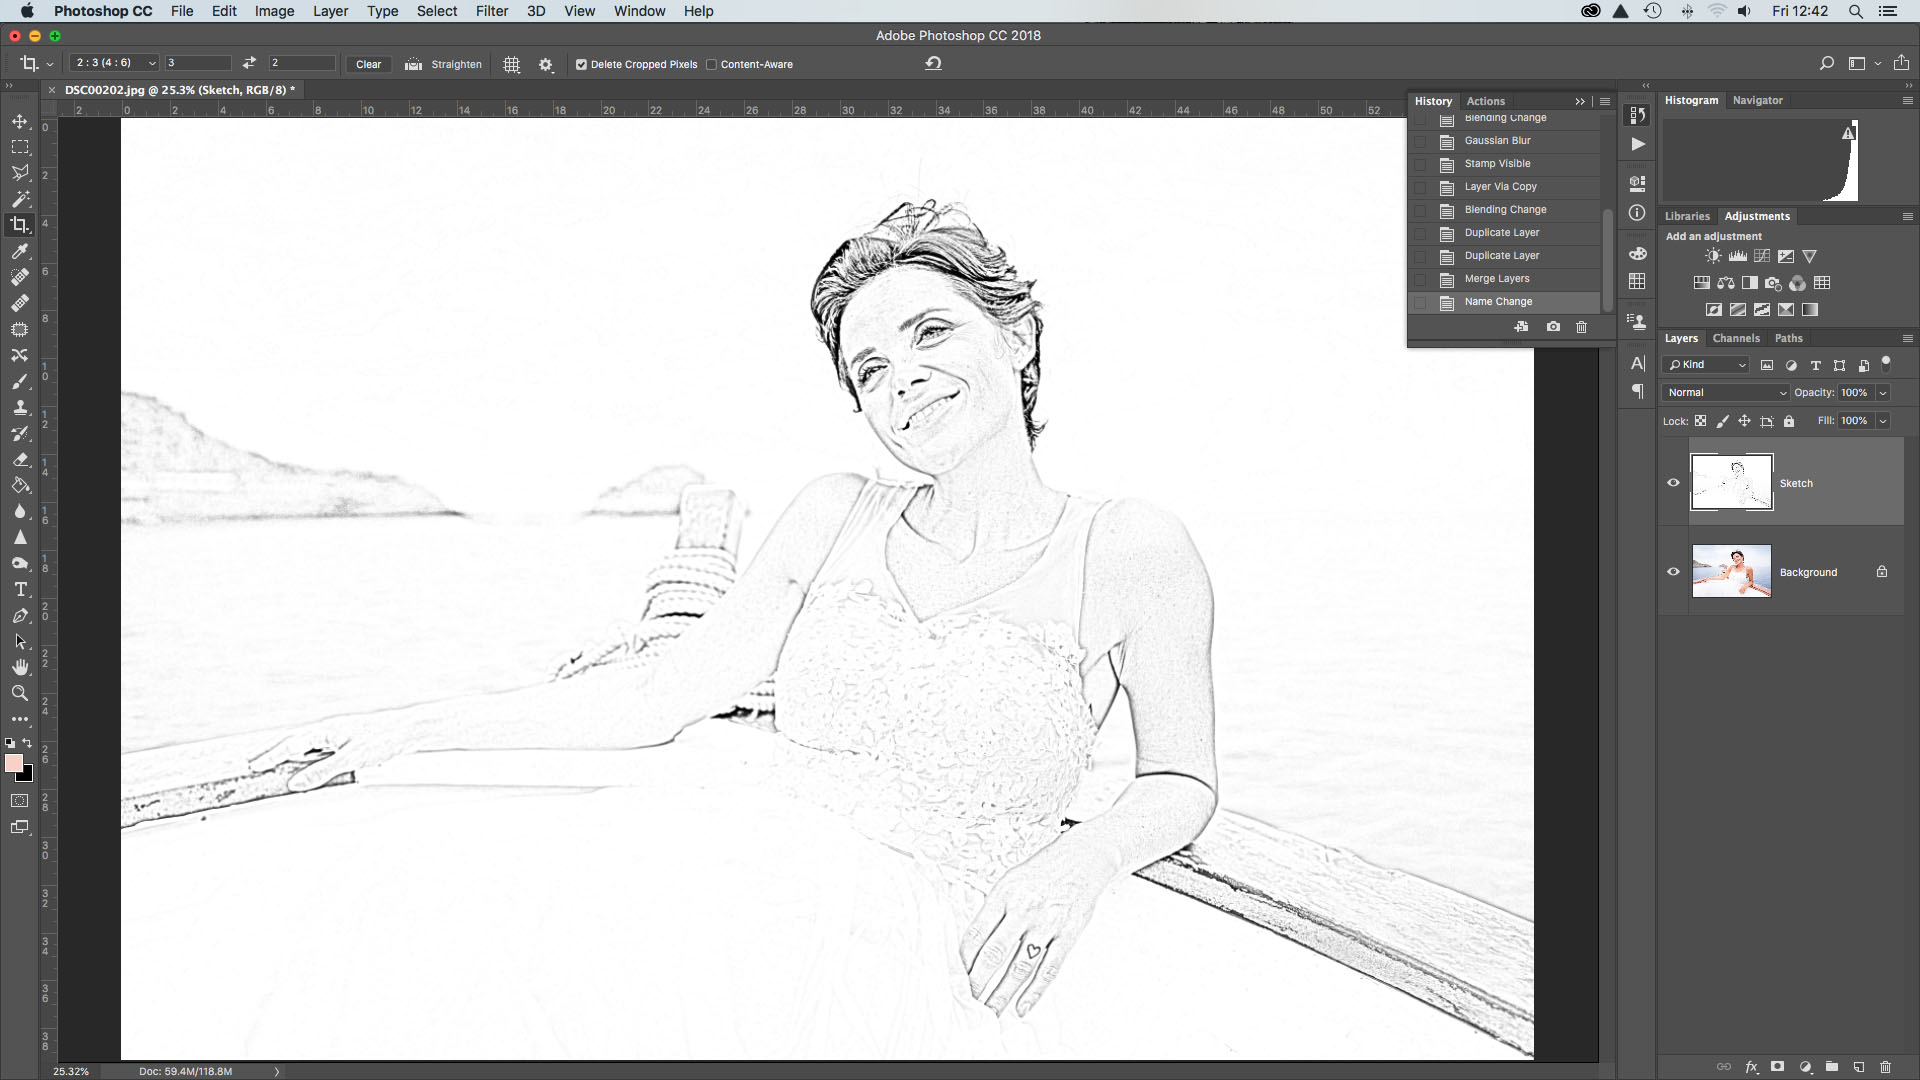
At the moment, the lines aren't looking as defined as we'd similar. To remedy this, hit Cmd/Ctrl + Shift + Alt + East to merge the layer with the one below, so Cmd/Ctrl + J to copy it. Set the Blend Mode to Multiply, then copy the layer 3 times to make the lines stronger. Highlight the top layer, Shift + click the layer above the background and hit Cmd/Ctrl + E to merge all the layers together with the exception of the background layer. Rename the layer Sketch.
Footstep three: Clean it up
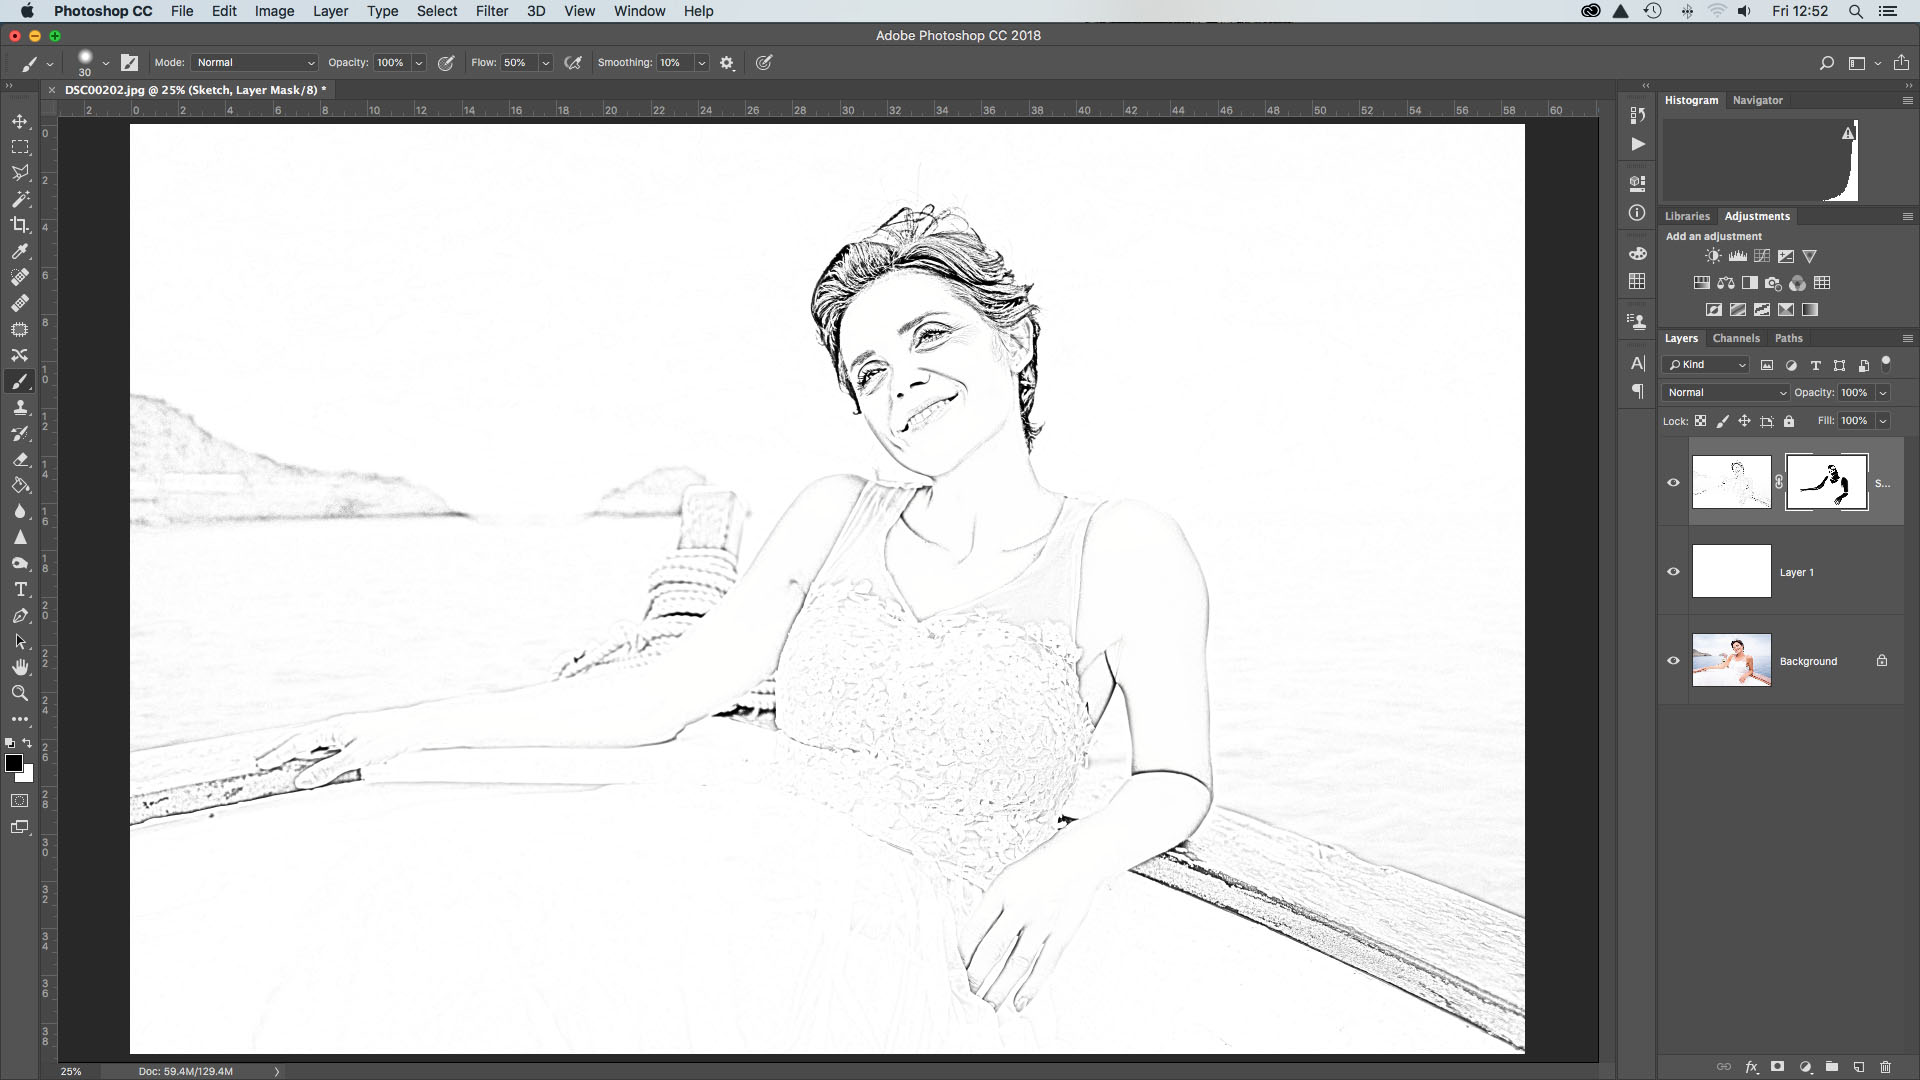
Chances are that the image needs a flake of tidying up. To practice this, make a new layer, drag information technology beneath the sketch layer, so become to Edit > Make full Layer. Set Employ: White and hitting OK. Side by side highlight the Sketch layer and click the Add Layer Mask icon in the Layers Panel. Catch the Brush tool and set color to black, then paint to tidy up the skin, apparel and hair where necessary.
Pace four: Pigment in colors
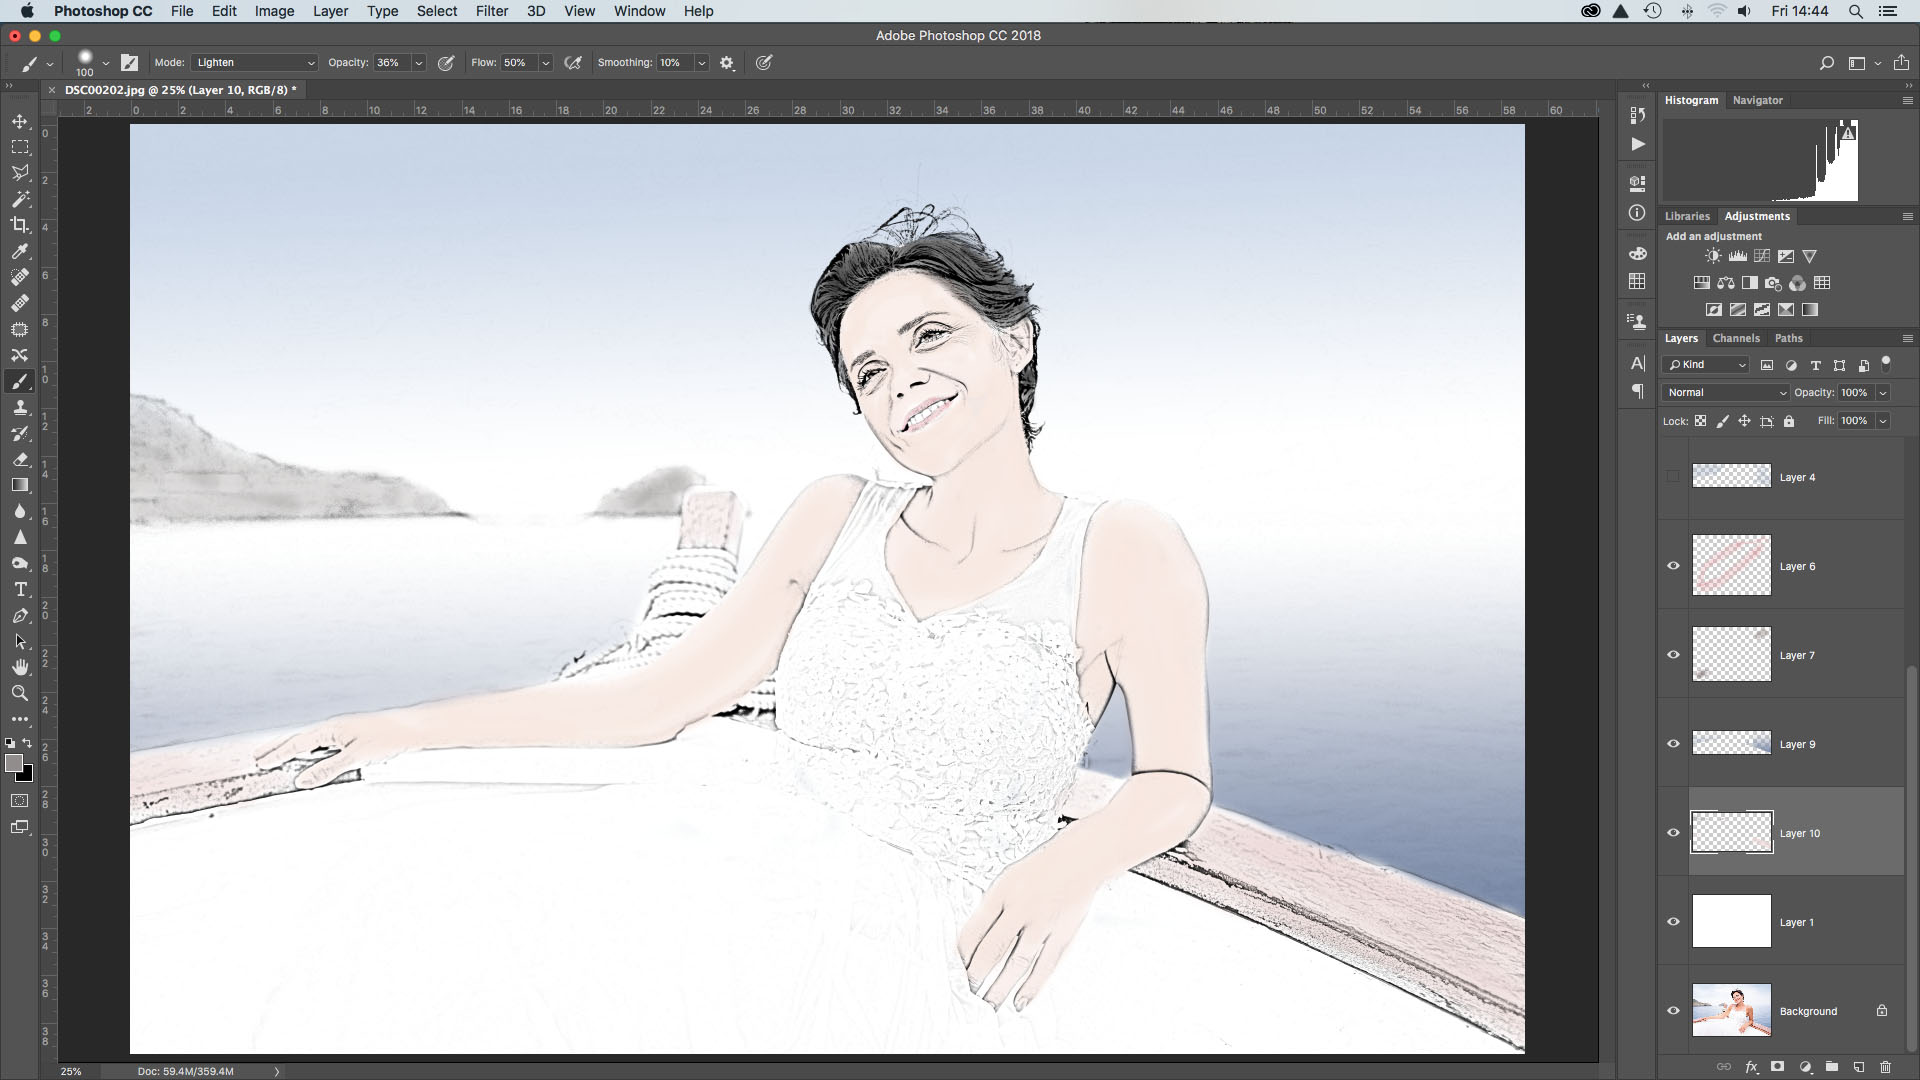
To cease off, we'll add back some colour, only how much yous do is downward to personal taste. First up, modify the Blend Mode of the Sketch layer to Multiply, then make a new layer and drag it below. Grab the Castor tool and cull a color for the skin, then begin painting. Make more new layers and paint unlike colors for the pilus, eyes, oral cavity and and whatever else you feel needs it. And you lot're done.
- Can't afford Photoshop? Hither are the best free photo editors
- All-time laptops for photographers and photo editing in Photoshop
- x Photoshop editing skills every photographer should know
- The 10 rules of photo composition

Phil Hall is an experienced writer and editor having worked on some of the largest photography magazines in the UK, and now edit the photography channel of TechRadar, the Great britain'southward biggest tech website and one of the largest in the earth. He has too worked on numerous commercial projects, including working with manufacturers like Nikon and Fujifilm on bespoke printed and online camera guides, as well as writing technique blogs and copy for the John Lewis Technology guide.

Source: https://www.techradar.com/how-to/how-to-turn-photos-into-drawings-using-photoshop
Posted by: boydmixtiffinuel.blogspot.com
0 Response to "How To Make A Photo Into A Drawing"
Post a Comment